
How to Enable M365 Groups, Teams and SharePoint Sites Option in Sensitivity Labels in Microsoft Purview
Microsoft Purview offers a comprehensive suite of tools designed to ensure the protection and governance of data across your organization’s digital landscape. One of its key features is the ability to apply sensitivity labels to Teams, Microsoft 365 Groups and SharePoint sites. In this blog post, we’ll walk through the steps to enable the Groups & Sites option in Sensitivity Labels scope definition within Microsoft Purview.
What are Sensitivity Labels?
Sensitivity labels are part of Microsoft’s Information Protection framework, allowing organizations to classify and protect data based on its sensitivity. These labels can be applied to various content types including Emails, Documents, Teams, Microsoft 365 Groups and SharePoint Sites.
When creating a new Sensitivity Label, you can currently choose from three options for the label’s scope:
1. Items: This includes emails, files and meetings.
2. Groups and Sites: This affects Microsoft 365 Groups, Microsoft Teams and SharePoint Sites.
3. Schematized Data Assets: Labels scoped here are utilized by Microsoft Purview Data Map. Schematized data assets include SQL, Azure SQL, AWS RDS and more.
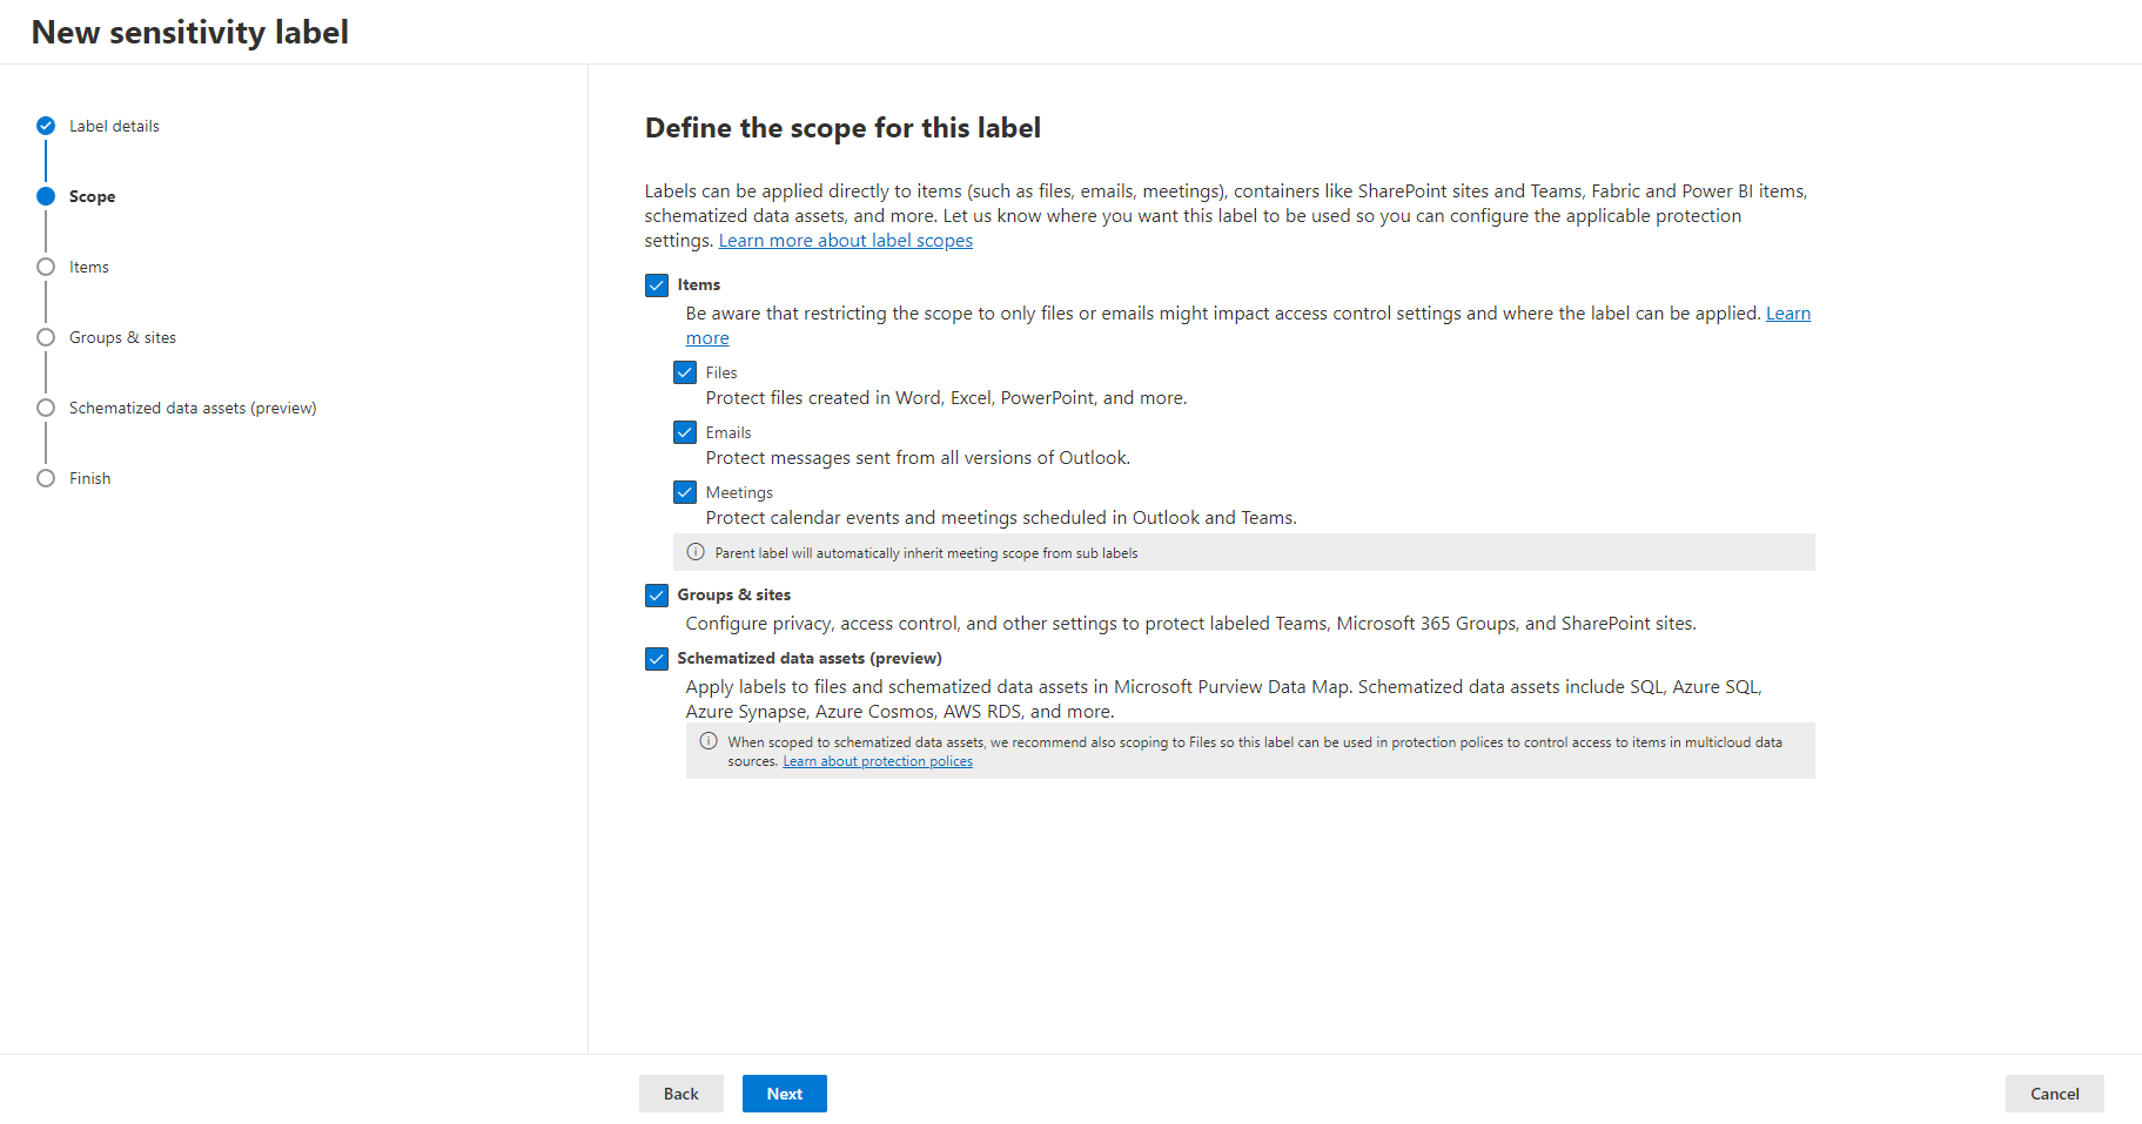
During label configuration, the second configuration step of the New Sensitivity Label wizard allows you to select the scope. (Image below)
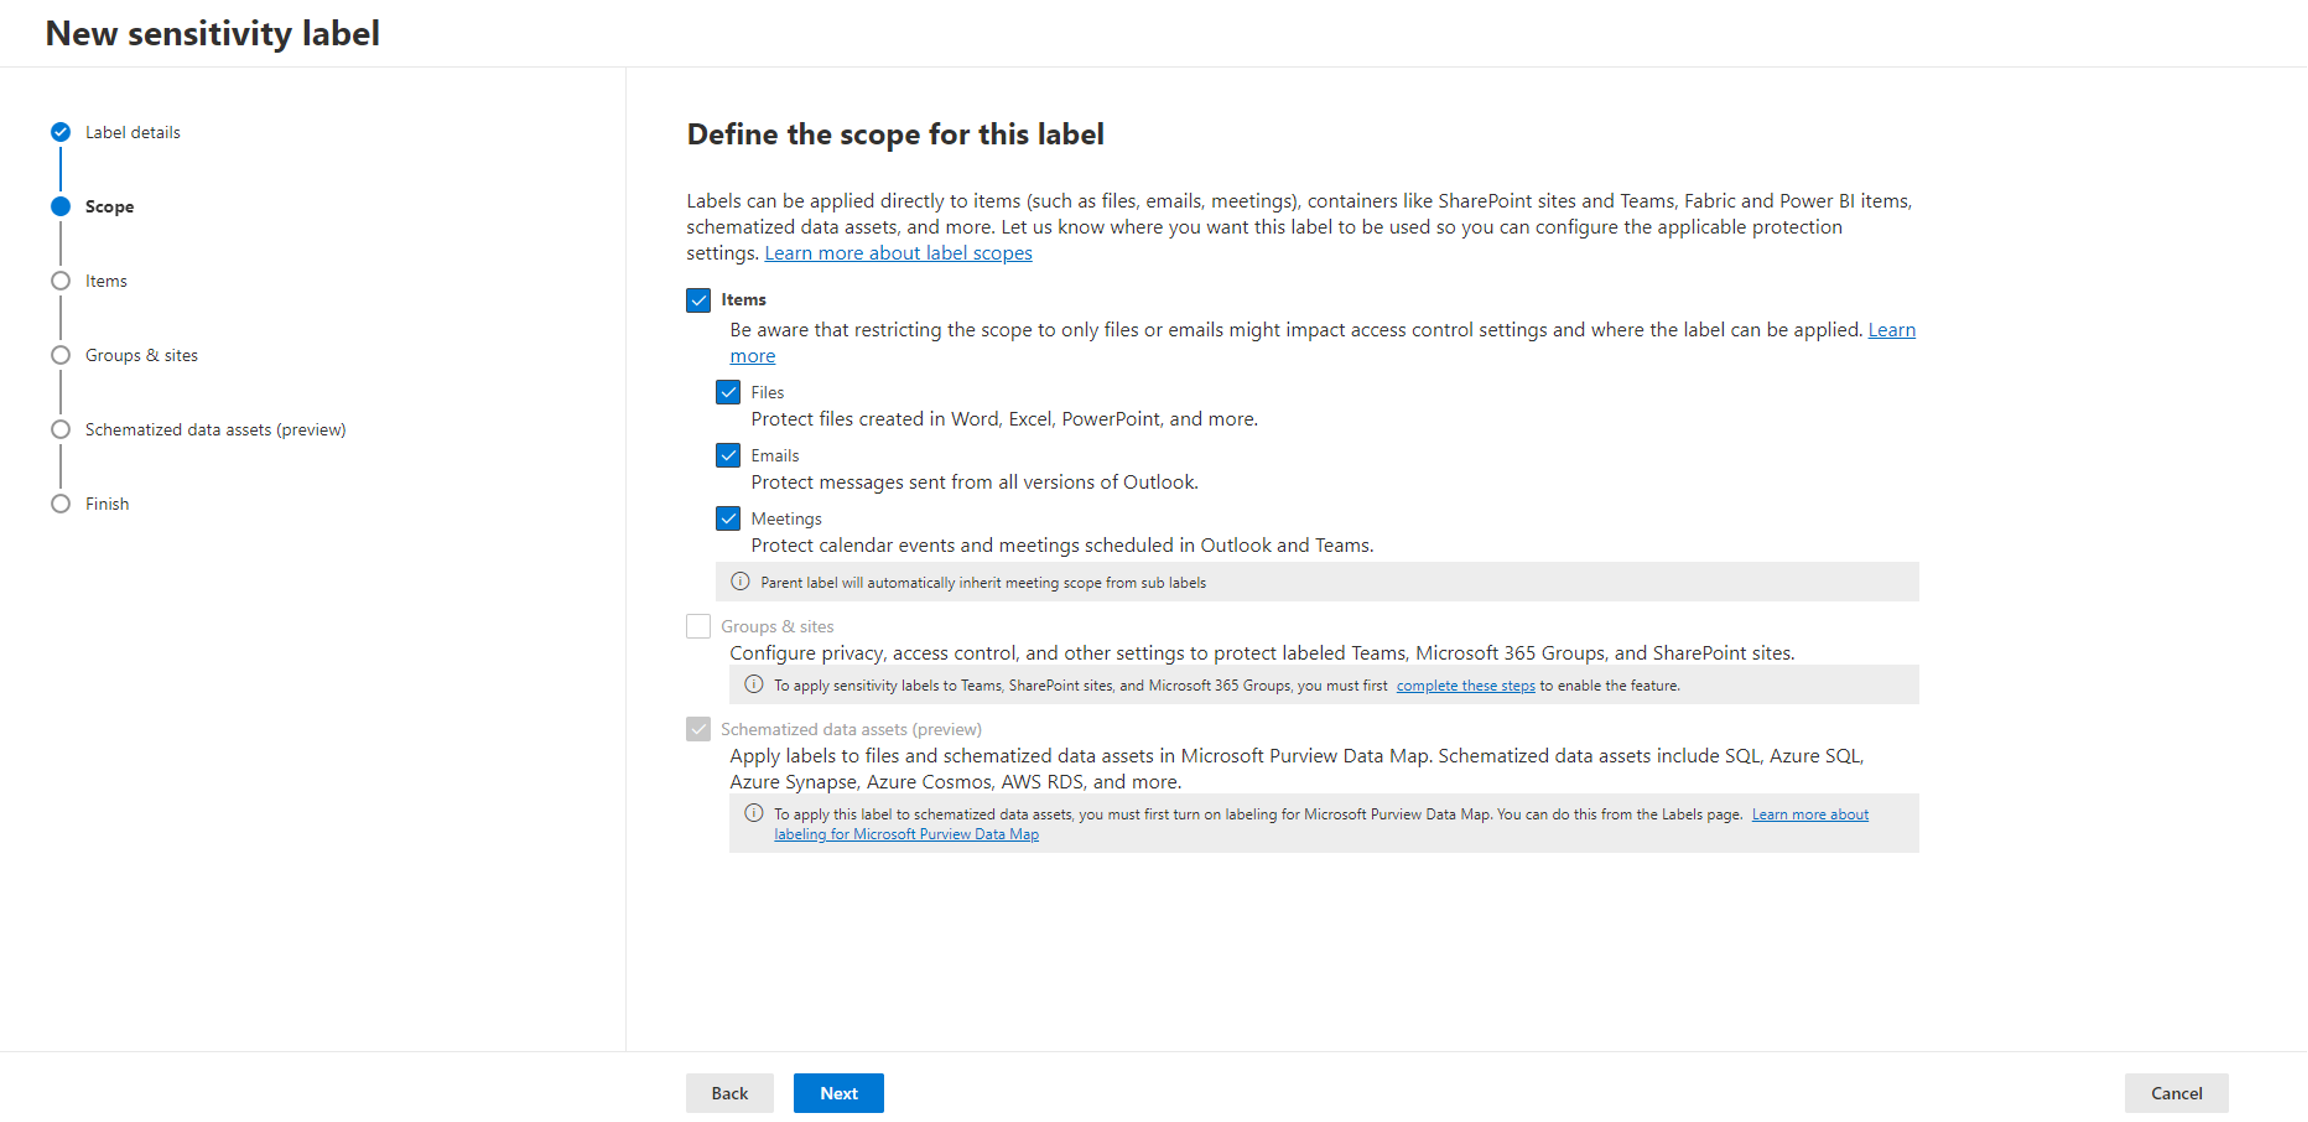
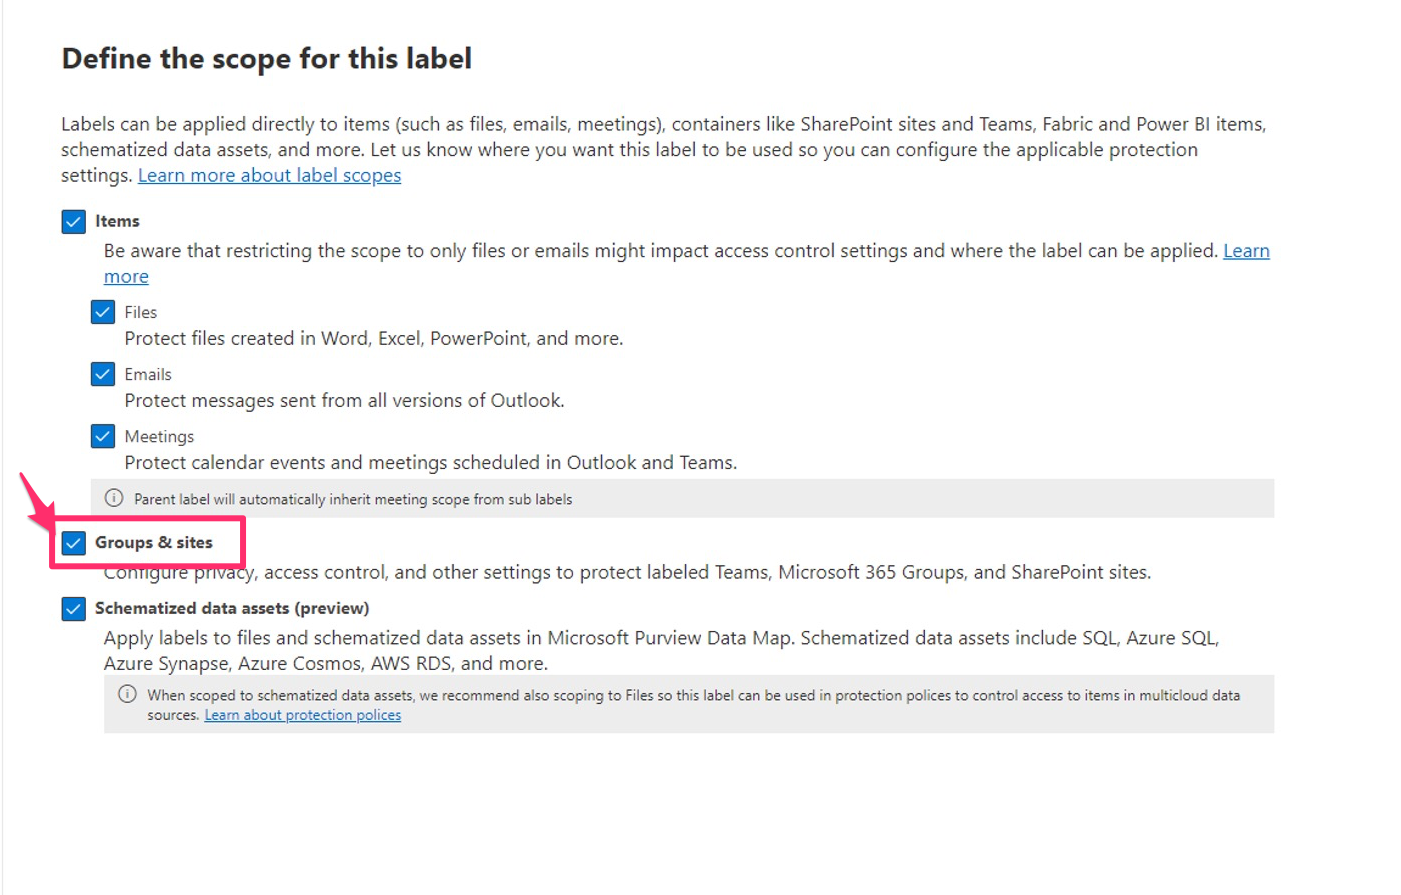
The option we are focusing on in this post is “Groups & Sites“. It will let you to define labels for Teams, SharePoint sites and M365 groups. When you first try to define a scope, this option is disabled, and you need to configure some settings using PowerShell to enable it.
Step by Step Guide :
1- Open a PowerShell window as an Administrator. Install and import the AzureADPreview module with these commands:
Install-Module AzureADPreview
Import-Module AzureADPreview
AzureADPreview\Connect-AzureAD
2- Retrieve the current group settings for your Azure Ad and check if sensitivity labels are enabled:
$grpUnifiedSetting = (Get-AzureADDirectorySetting | where -Property DisplayName -Value "Group.Unified" -EQ)
$Setting = $grpUnifiedSetting
$grpUnifiedSetting.Values
If Sensitivity Labels for Groups and Sites are disabled, it’s highly probable that group settings have been established but MIP Labels haven’t been enabled in your organization. So, the last command will provide the required information about that. If nothing returned by running the last command that’s mean, there are no group settings configured. So run the command in next step to enable it.
3- Let’s Run the following command to enable Sensitivity Labels in AzureAD:
$Setting["EnableMIPLabels"] = "True"After running above command, you may get the following error: (If you didn’t encounter with this error easily jump to Step 4)
At line:1 char:1
$Setting[“EnableMIPLabels”] = “True”
FullyQualifiedErrorId : NullArray
So, you need to edit the “Group.Unified” template to be able to add EnableMIPLabels setting.
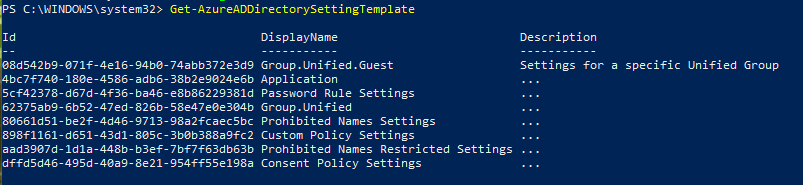
Run the following command to get list of all settings template and check if you have “Group.Unified” template:
Get-AzureADDirectorySettingTemplateYou will see the following list:
Now you need to edit “Group.Unified” template to be able to add your settings. So run the following command:
$TemplateId = (Get-AzureADDirectorySettingTemplate | where { $_.DisplayName -eq "Group.Unified" }).Id
$Template = Get-AzureADDirectorySettingTemplate | where -Property Id -Value $TemplateId -EQ
Now you need to create a new settings object based on that template:
$Setting = $Template.CreateDirectorySetting()
Now you should be able to set the EnableMIPLabels to True without any errors by running the following command:
$Setting["EnableMIPLabels"] = "True"
If you run the $settings.Values command, you will get the following output:
$Setting.Values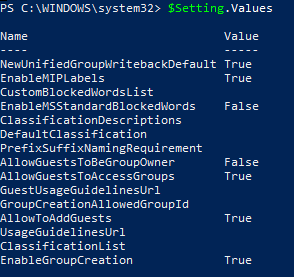
Now, you can jump to Step 5 and you don’t need to run the Step 4 command.
4- Run the following command to save the settings:
Set-AzureADDirectorySetting -Id $grpUnifiedSetting.Id -DirectorySetting $Setting5- Then run the following command to load the Exchange Online PowerShell module:
Install-Module -name ExchangeOnlineManagement
Import-Module ExchangeOnlineManagement
6- After installing and importing ExchangeOnline module, run the following command to connect to the Security & Compliance PowerShell:
Connect-IPPSSession -UserPrincipalName <UPN>You may encounter an error like following after executing the Connect-IPPSSession command :
loaded. The file C:\Users\Arash\AppData\Local\Temp\tmpEXO_s5omvlxv.wdl\tmpEXO_s5omvlxv.wdl.psm1 is not digitally
signed. You cannot run this script on the current system. For more information about
running scripts and setting execution policy, see about_Execution_Policies at
https:/go.microsoft.com/fwlink/?LinkID=135170.
At C:\Program Files\WindowsPowerShell\Modules\exchangeonlinemanagement\3.4.0\netFramework\
ExchangeOnlineManagement.psm1:762 char:21
+ throw $_.Exception.InnerException;
+ ~~~~~~~~~~~~~~~~~~~~~~~~~~~~~~~~~
+ CategoryInfo : OperationStopped: (:) [], UnauthorizedAccessException
+ FullyQualifiedErrorId : File C:\Users\Arash\AppData\Local\Temp\tmpEXO_s5om
vlxv.wdl\tmpEXO_s5omvlxv.wdl.psm1 cannot be loaded. The file C:\Users\Arash\
AppData\Local\Temp\tmpEXO_s5omvlxv.wdl\tmpEXO_s5omvlxv.wdl.psm1 is not digitally sign
ed. You cannot run this script on the current system. For more information about runn
ing scripts and setting execution policy, see about_Execution_Policies at https:/go.m
icrosoft.com/fwlink/?LinkID=135170.
To fix this error, run the following command to enable unsigned command execution for the current PowerShell session:
Set-ExecutionPolicy -Scope Process -ExecutionPolicy BypassThen try again the Connect-IPPSSession command as follows. It should be run without any issue.
Connect-IPPSSession -UserPrincipalName <UPN like USER@DOMAIN.COM>7- Run the following command to ensure that Sensitivity Labels can be used with Microsoft Teams, SharePoint Sites, and M365 Groups:
Execute-AzureAdLabelSync8- Then run this command to disconnect the ExchangeOnline connection session:
Disconnect-ExchangeOnline -Confirm:$falseNow, if you go back to the Microsoft Purview Information Protection and configure a new sensitivity label, you will see that the Groups & Sites option is enabled, you can select it and continue with the settings you want to choose through the wizard.
References:
https://learn.microsoft.com/en-us/powershell/exchange/connect-to-scc-powershell?view=exchange-ps