
Microsoft Syntex: Enablement, Model Types and Licensing
Microsoft Syntex is Microsoft’s AI-based tool that promises to revolutionize the way organizations manage content and information. With its advanced capabilities in content understanding, classification, and automation, Syntex enables businesses to extract valuable insights from their data and streamline their processes. In this article, we will explore how you can enable the power of Microsoft Syntex in your Microsoft 365 tenant.
Syntex Models
Content understanding in Microsoft Syntex starts with document processing models. Document processing models let you identify and classify documents that are uploaded to SharePoint document libraries, and then to extract the information you need from each file.
When applied to a SharePoint document library, the model is associated with a content type and has columns to store the information being extracted. The content type you create is stored in the SharePoint content type gallery. You can also choose to use existing content types to use their schema.
Microsoft Syntex offers two main types of models for document processing: Custom Models and Prebuilt Models. Custom models are created specifically for your organization’s unique requirements, while prebuilt models are already trained to recognize specific types of structured documents. These models are associated with content types in SharePoint and store the extracted information in SharePoint columns.

1. Custom Models
Custom models in are designed to handle various file types and formats, depending on your specific needs. Let’s explore the different types of custom models available:
1.1 Unstructured Document Processing
The unstructured document processing model is ideal for classifying and extracting information from unstructured documents such as letters or contracts. These documents often have consistent patterns or phrases that can be identified to extract the required data. For example, a contract renewal letter may contain the text “Service start date of” followed by an actual date.
This model type supports a wide range of file types and is particularly effective for files using the Latin alphabet (English characters). When creating an unstructured document processing model, the teaching method is used to train the model.
1.2 Freeform Document Processing
The freeform document processing model is designed to extract information from unstructured and freeform documents where the data can appear anywhere in the file. This model is particularly useful for processing large quantities of letters and documents received from various sources such as mail, fax, and email.
By leveraging AI, this model automates the extraction process, saving valuable time and effort. It is best suited for English documents in PDF or image files and does not require automatic classification of the document type. The freeform selection method is used to create and train this model using Microsoft Power Apps AI Builder.
1.3 Structured Document Processing
The structured document processing model is optimized for identifying field and table values in structured or semi-structured documents like forms and invoices. This model understands the layout of your specific form based on example documents, allowing it to extract data from similar locations.
The structured document processing model supports a wide range of languages and is trained to recognize specific data fields based on their location. When creating a structured document processing model, the layout method is used for training.
To create a custom model in Microsoft Syntex, you need to choose the appropriate training method based on the model type. Here are the training methods associated with each custom model:
| Custom Model Type | Training Method |
|---|---|
| Unstructured Processing | Teaching Method |
| Freeform Document | Freeform Selection Method |
| Structured Document | Layout Method |
To compare the custom models, check out this article in Microsoft Learn site.
2. Prebuilt Models
If you don’t need to create a custom model from scratch, Microsoft Syntex offers prebuilt models that are already trained to extract information from specific types of structured documents. These models can be a great starting point for organizations that require quick implementation and don’t have the resources to build a custom model.
The prebuilt models available in Microsoft Syntex include:
2.1 Contract Processing
The contract processing model is designed to analyze and extract key information from contract documents. It can analyze contracts in various formats and extract important contract details such as client or party name, billing address, jurisdiction, and expiration date. This model can save organizations significant time and effort by automating the extraction process.
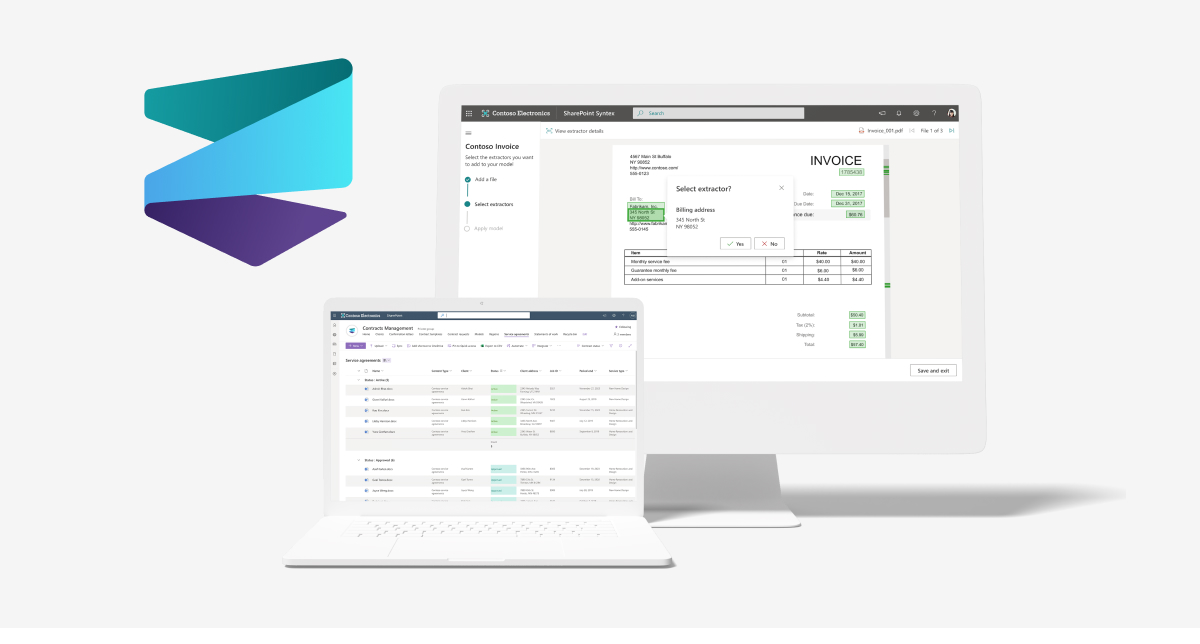
2.2 Invoice Processing
The invoice processing model is specifically trained to extract key information from sales invoices. It can analyze invoices in different formats and extract important invoice details such as customer name, billing address, due date, and amount due. By leveraging this prebuilt model, organizations can streamline their invoice processing workflows and reduce manual data entry.
2.3 Receipt Processing
The prebuilt receipt processing model is designed to analyze and extract key information from sales receipts. It can process both printed and handwritten receipts and extract important receipt details such as merchant name, merchant phone number, transaction date, tax, and transaction total. This model can significantly speed up the receipt processing process and eliminate manual data entry errors.
By using prebuilt models, organizations can reduce the time and effort required for model creation, training, and implementation. These models have already been trained on specific document types, allowing for quick and accurate extraction of relevant information.
Choosing the Right Model for Your Needs
When selecting a model for your organization’s content understanding needs, it is essential to consider the types of files you work with, the format and structure of the documents, and the specific information you need to extract. Here are some factors to consider when choosing the right model:
- File types: Determine if the model supports the file types you frequently work with.
- Document structure: Assess if the model can handle the structure and format of your documents.
- Required information: Identify the specific data fields you need to extract from the documents.
- Language support: Consider the language support provided by the model.
- Classification requirements: Determine if automatic classification of document types is necessary.
By carefully evaluating these factors, you can select the most suitable model that aligns with your organization’s content understanding goals.
Enable Microsoft Syntex
To access the powerful features of Microsoft Syntex, you have only one enablement option: Microsoft Syntex pay-as-you-go (PAYG) licensing. Let’s explore this option and how to configure it on your M365 tenant.
Microsoft Syntex is using pay-as-you-go licensing model as it is a flexible licensing model that allows you to use Syntex services without any upfront purchasing or long-term commitment. With this option, you can pay for Syntex using your Azure subscription. The pay-as-you-go model supports a range of Microsoft Syntex services, including prebuilt document processing, unstructured document processing, content assembly, image tagging, taxonomy tagging, and optical character recognition (OCR).
To use Microsoft Syntex, users must have a valid license for Microsoft 365.
To setup PAYG licensing and enable the Microsoft Syntex in your tenant, do the following steps :
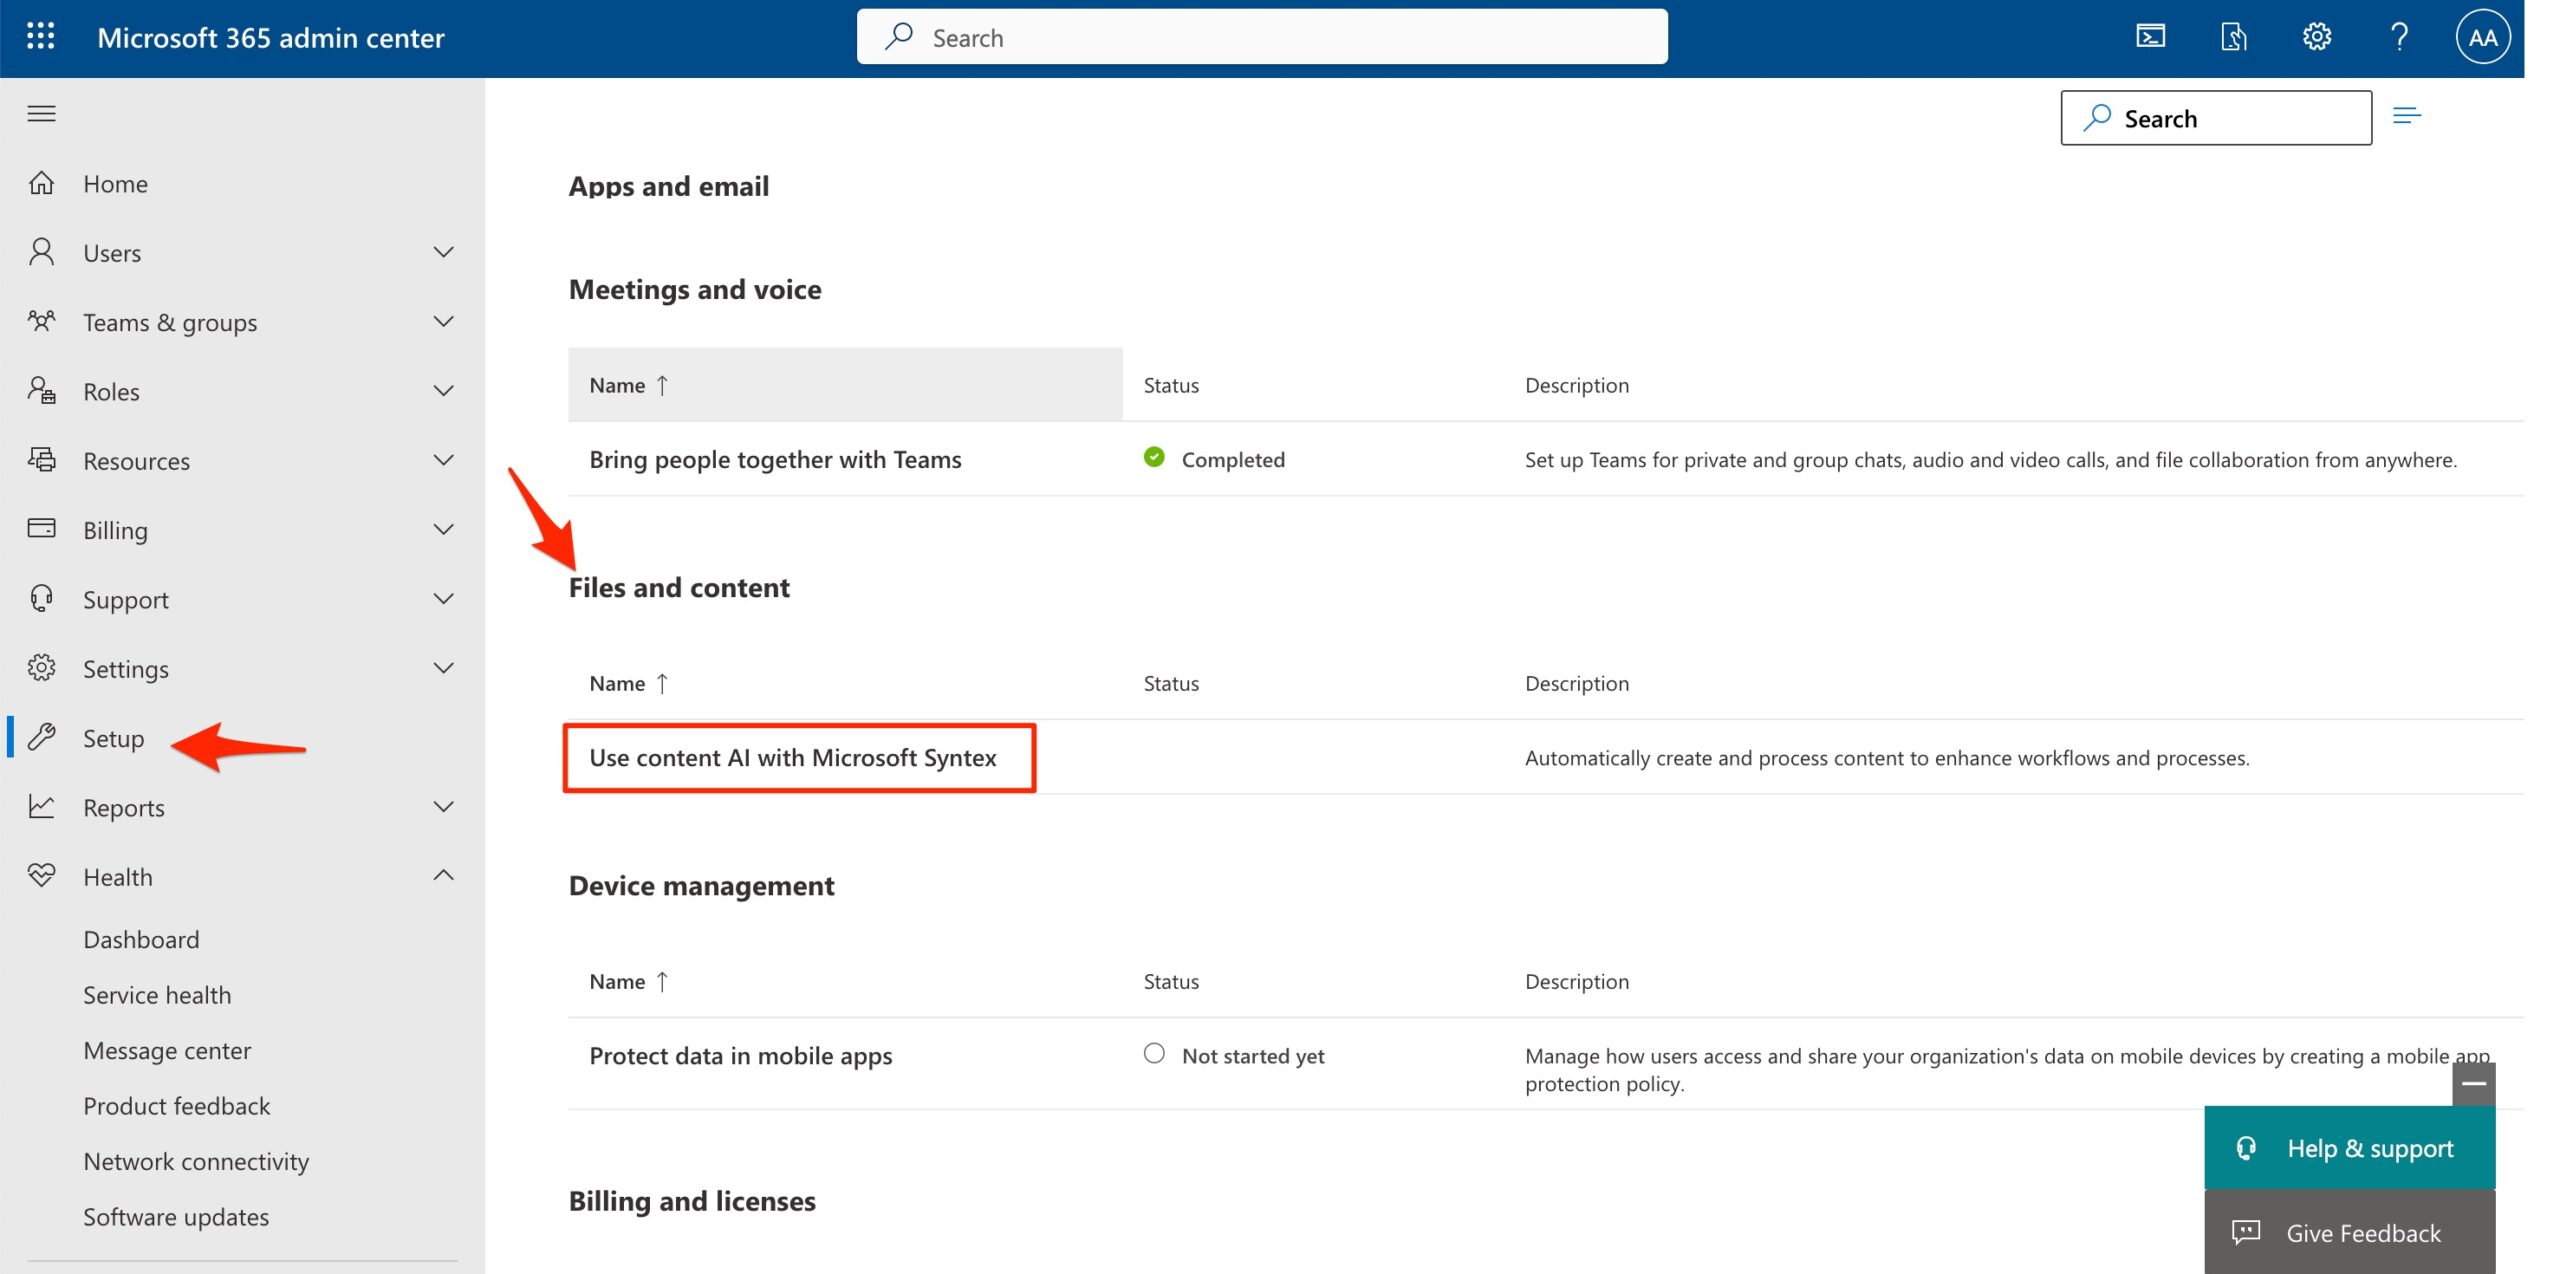
1) Sign in to the Microsoft 365 Admin Center with admin credentials. Click on “Setup” in left navigation. then in Files and Content section, Click on “Use Content AI with with Microsoft Syntex“
2) In the opened page, Click on “Manage billing” box :

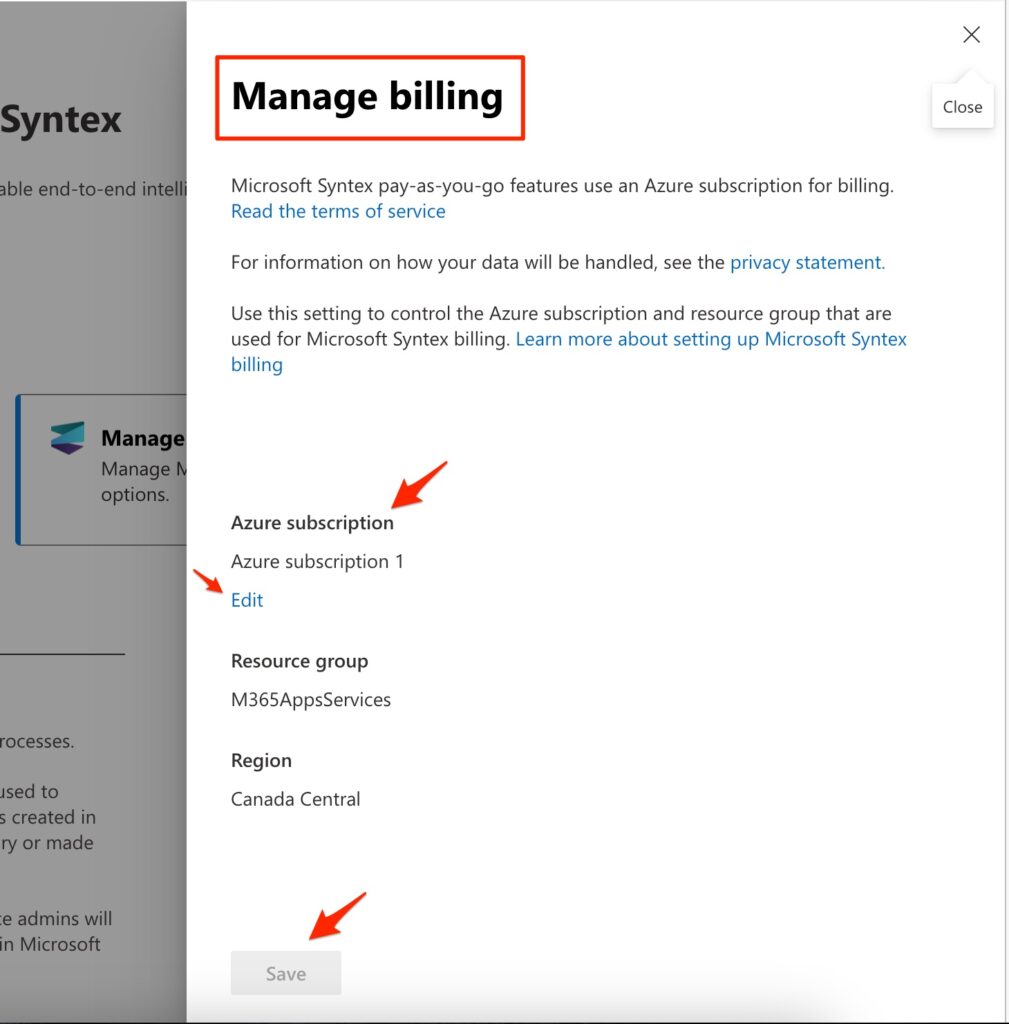
3) In manage billing page we need to define the values for Azure Subscription, Resource Group and Region. For this purpose, Click on Edit button below of Azure Subscription to configure the subscription. (I used Azure Subscription 1 which I’ve created before)
4) In the following page we are going to setup Prerequisites by creating Azure Subscription and Resource Group. When it’s done then the subscription information will be appear in “Set up Billing” section.
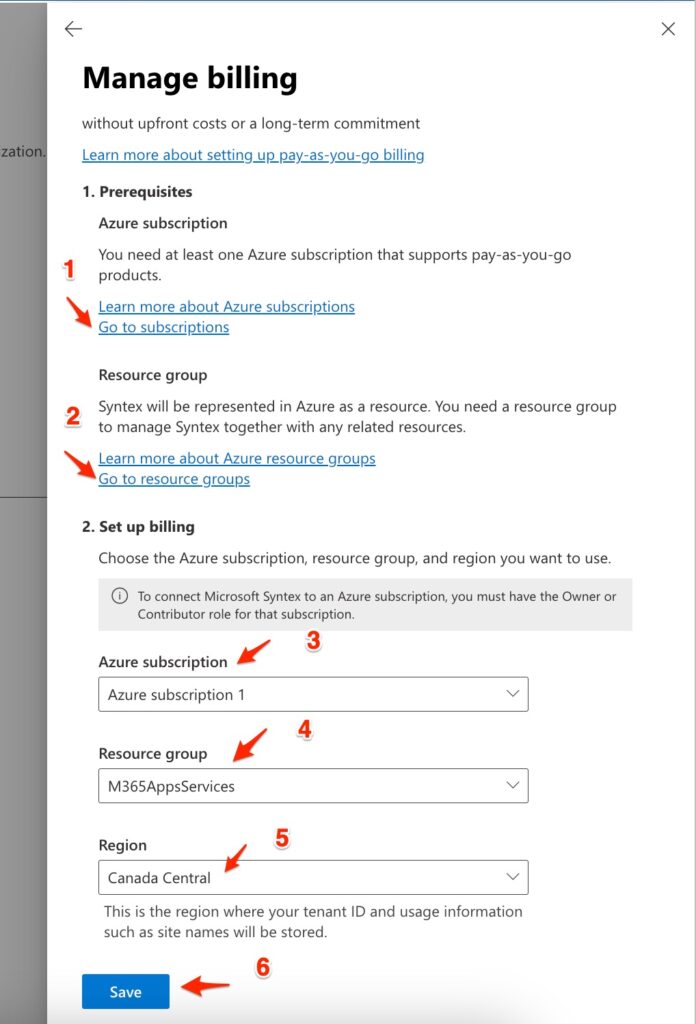
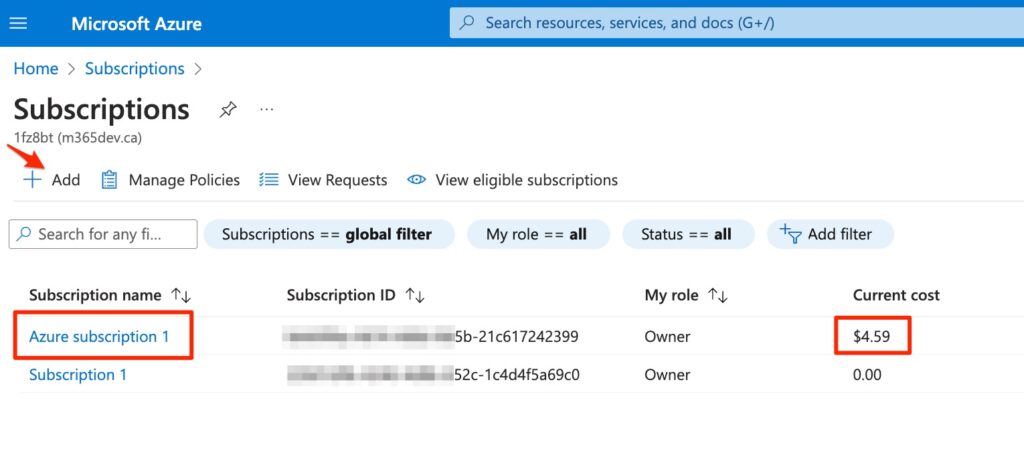
5) By clicking on “Go to Subscriptions” link, the following page will be open. Click the “Add” button to add a new subscription. I created “Azure Subscription 1“. (In Current Cost column you can see the cost amount for this subscription)
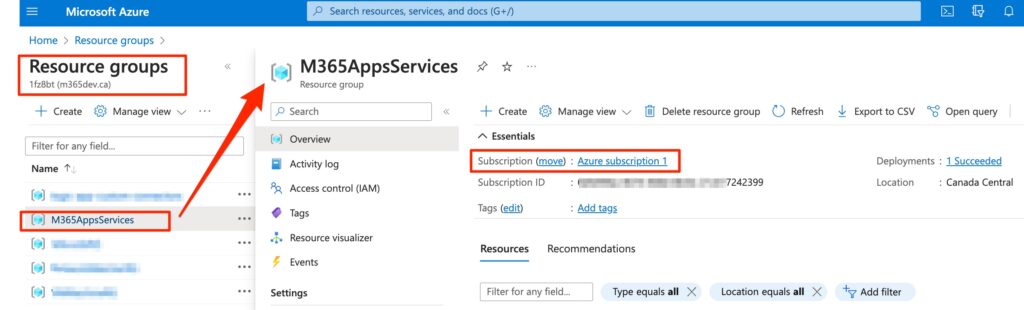
6) After creating subscription, go back to the Azure Portal home page and click on “Resource Groups“. You need to create a new Resource Group for created subscription. Resource Group is a container that holds related resources for an Azure solution. I used “M365AppsServices” name for the resource group as follows.
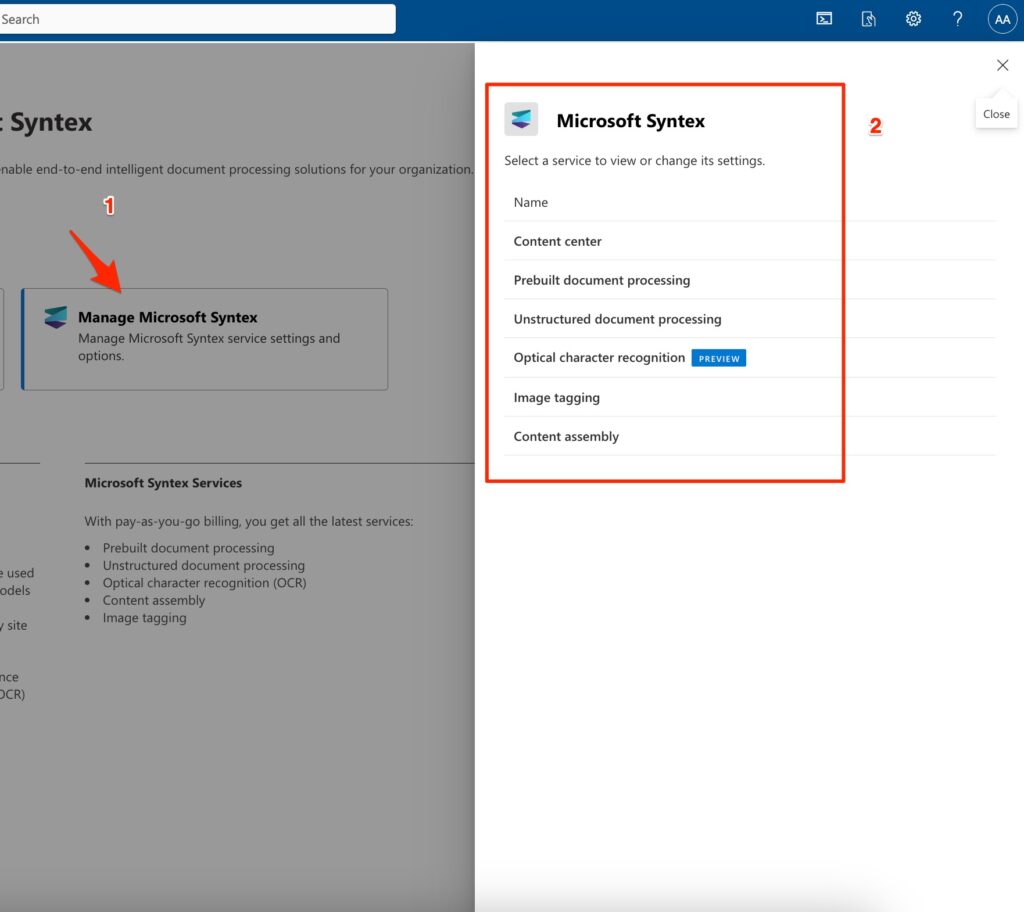
7) Now you can select Subscription and Resource Group name in “Set up Billing” section in Step 4 above. When it’s done, save the settings and go back to the “Use Content AI with Syntex” page. you can see the “Manage Microsoft Syntex” box is activated. Click on it and then the Syntex services panel will be appear as follows :
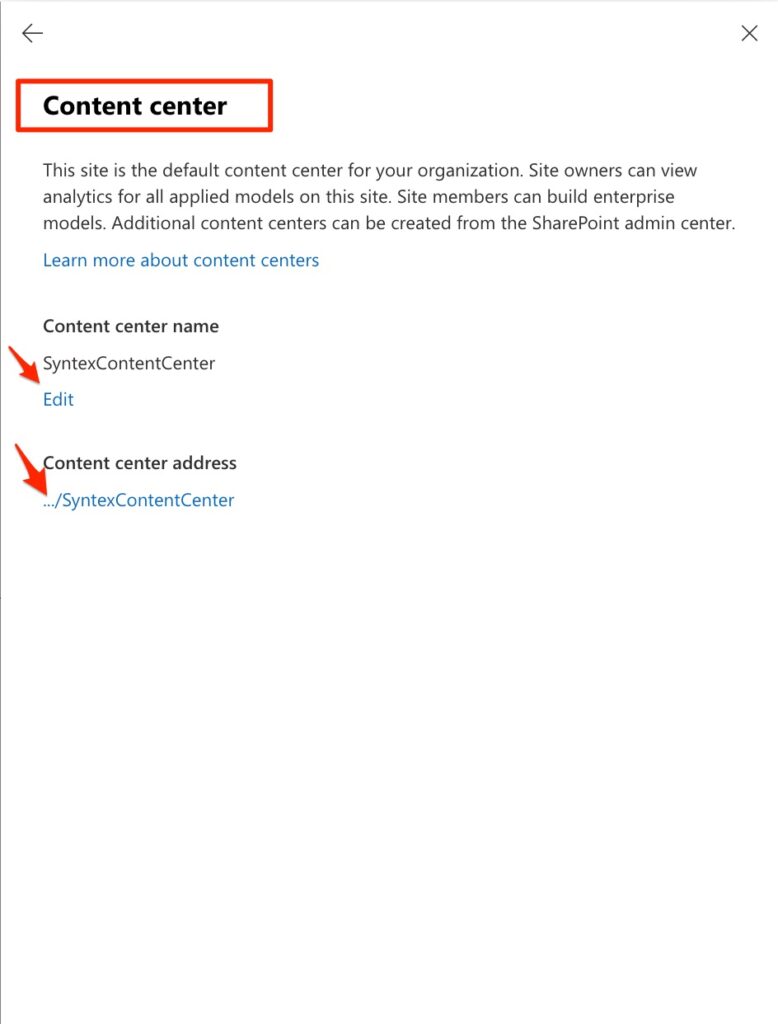
8) In the opened panel click on the Content Center and create the first Syntex Content Center. It will be a SharePoint Site Collection in your tenant. the default name is SyntexContentCenter and you can’t change it.
9) Now click the created site link and it opens the following site :
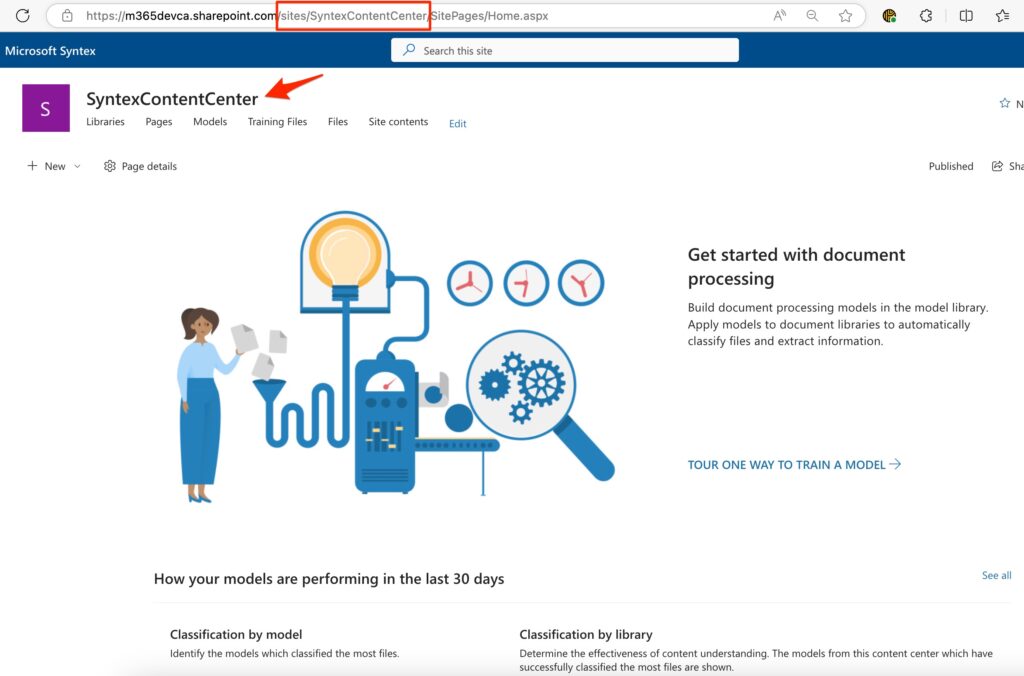
Once Syntex is enabled and the Content Center site is created, you will have access to Syntex services and models.
In the next articles, I will explain how to use the models with practical examples.
Useful links :